

[ad_1]
Tutorial: How to use lattice strips as an easy, inexpensive alternative to install a DIY batten wall for adding vintage character to plain walls.
Lattice strips are the MVP of this DIY batten wall project!
I mean they really are the unsung hero of a lot of little DIYs and crafts around here. (Remember that shower curtain art we framed with lattice strips a while back?) This time it needed a spotlight in the breakfast nook.

Since we kind of have an addiction to intricate wall molding around here, it’s absolutely no surprise at all that after we finished installing and painting our Facebook Marketplace banquette find in the breakfast nook, Robert and I looked at each other and said, “Something’s missing.”
Those smooth walls needed character! And lattice could do the job inexpensively. Because molding is one of my favorite ways to make a house look luxurious.
What is Lattice?
Lattice is made of thin strips of wood most commonly used in a criss-cross structure for trellises to support climbing plants in gardens or to serve as porch skirting.
But it’s perfect for simple wall molding projects too. (Kind of like Sharpie shiplap but way more legit.)
The price of molding has skyrocketed lately (along with every other home improvement supply), so we figured out a way to add pricey looking batten wall molding for the fraction of the price using handy dandy lattice strips at $1.28 per linear foot.
If you’ve never installed any type of molding before, it’s the perfect beginner version to try since it requires no miter cuts and lattice can sit flush right on top of your existing baseboards since they’re thinner than regular 1×2 boards.

How to Make a Batten Wall Using Lattice Strips
You could add this vertical batten wall all around the room, as wainscoting, or just as a board and batten accent wall. You could leave your walls plain without any wall decor for a minimalist approach or layer it with art for even more character.
It would be perfect for adding onto a plain kitchen island too. Keep in mind though, if you have a textured wall, the process won’t be as simple, since you will need to add these MDF panels to your textured walls using Liquid Nails and brad nails first.
Supplies
Steps to Make a Batten Lattice Wall

Step 1 – Measure and Decide on a Layout
Measure your entire wall first, decide how far apart you want your batten (vertical lattice strips) to be, and mark their placement on the wall with a pencil.
Remember that lattice strips are 1 1/2″ wide, so factor that into your layout plan. We set our battens to have an 8 1/2″ gap between.
Step 2 – Cut Lattice Length
Measure the height of your wall from baseboard to crown and cut the first lattice strip to the needed length with a jigsaw. (Not all walls will be perfectly the same height all the way across, so don’t cut all of your lattice based on that first measurement.)

Step 3 – Use a Level to Check Lattice Placement
“Dry fit” the first lattice strip and use a level to make sure it’s perfectly straight.
Step 4 – Nail Lattice
Once you’re happy with the lattice strip placement, nail it to the wall with the brad nailer (or a hammer).
You can use construction adhesive here as well, if you choose, but because the lattice is so lightweight, it’s completely optional. (The batten wall will also be easier to remove without adhesive later if one day you change your mind.)

Step 5 – Repeat
Repeat Steps 2-4 until you’ve placed all lattice strips along the wall.

Step 6 – Caulk Cracks and Wood Fill Nail Holes
Caulk all of the edges of the lattice strips to fill all of the cracks, and fill all of the nail holes with wood filler.

Step 7 – Sand Wood Filler
Once the wood filler is fully dry, sand smooth with fine grit sandpaper (we use an orbital sander to make the process go faster). Brush away any sanding dust after.

Step 8 – Paint
Give everything a fresh coat of paint and you’re done! (We painted the wall first with the same color we planned to use on the lattice strips so that we wouldn’t have to work around all of the details afterwards.)

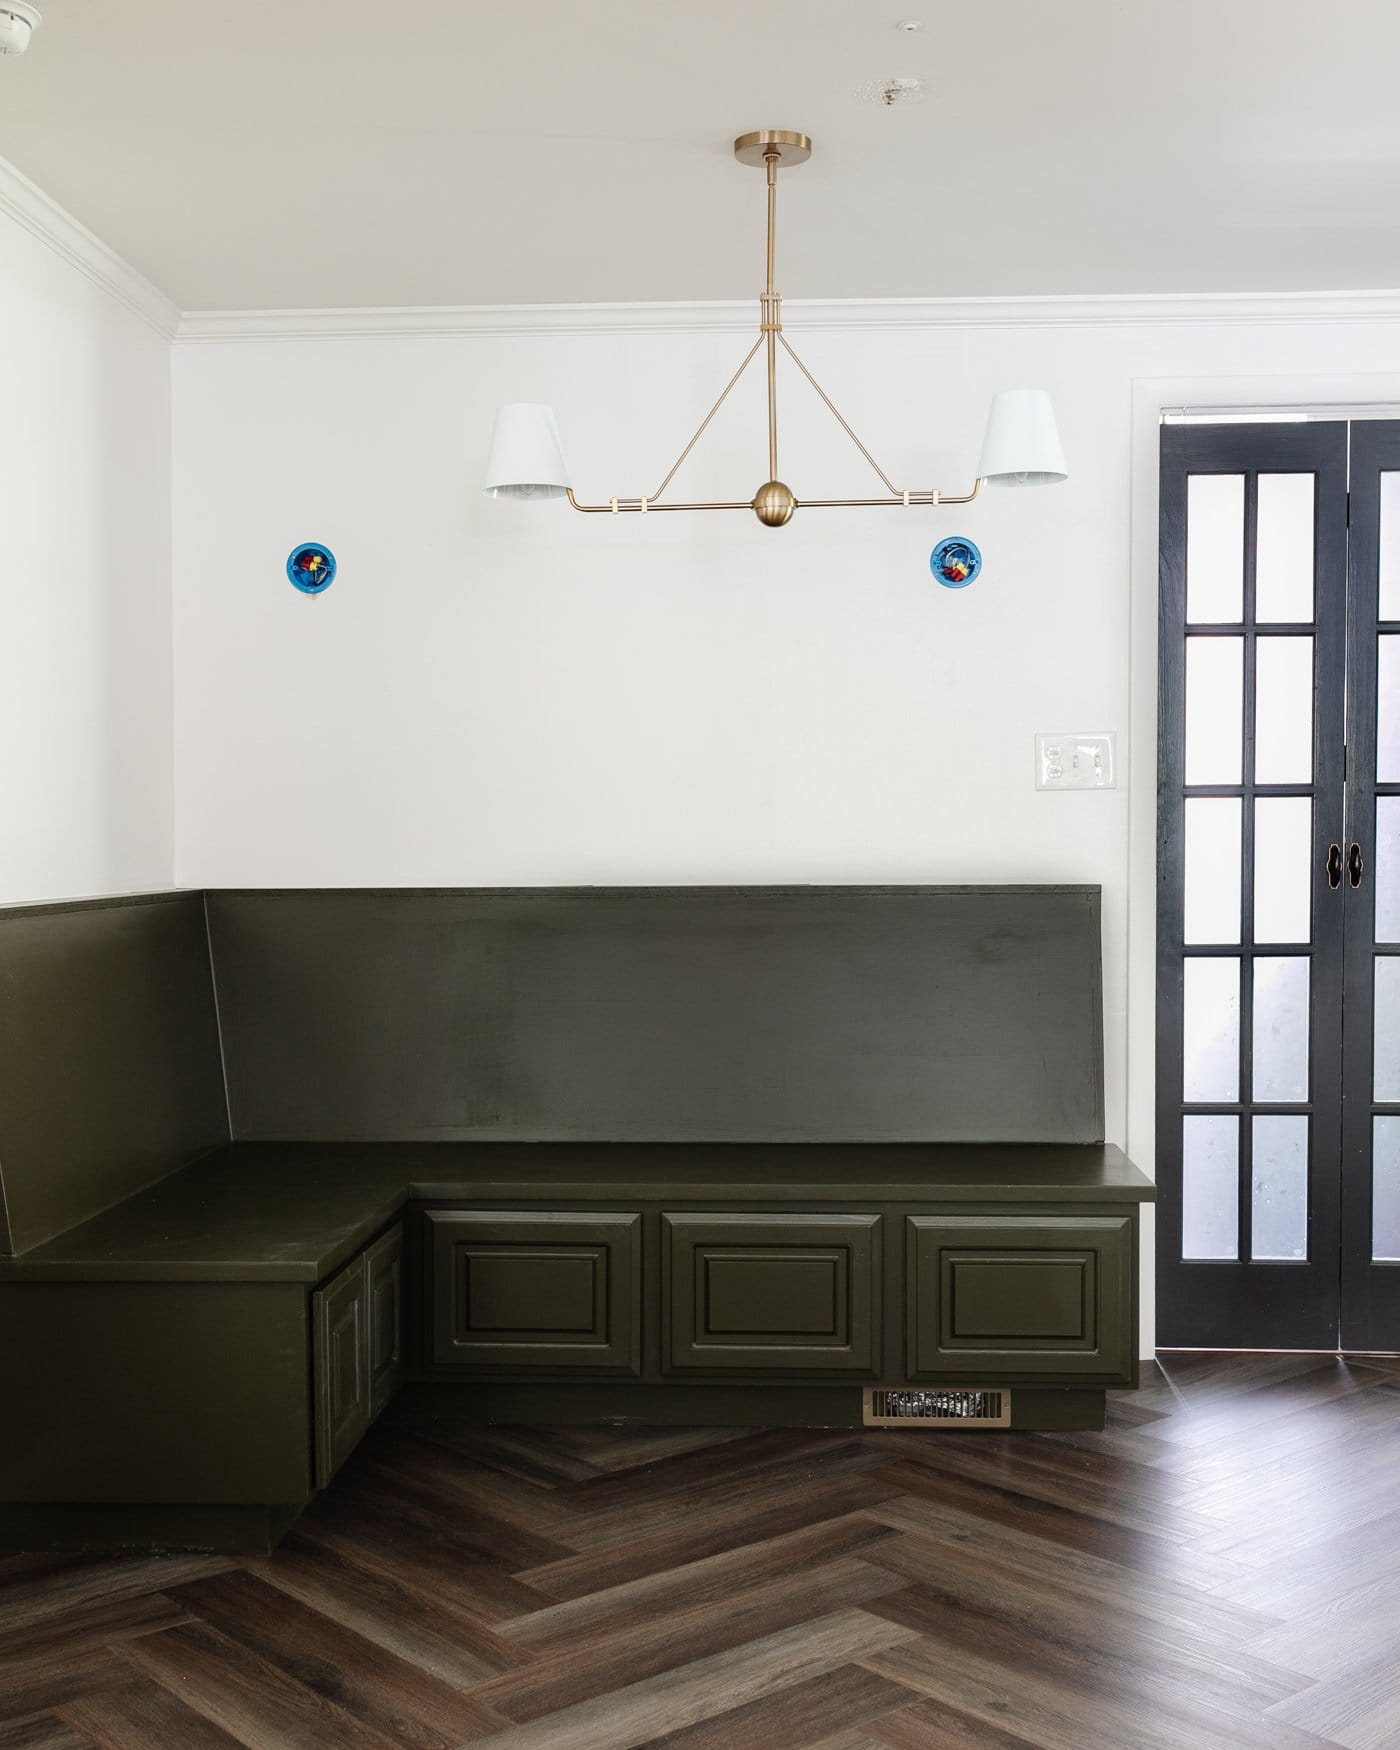
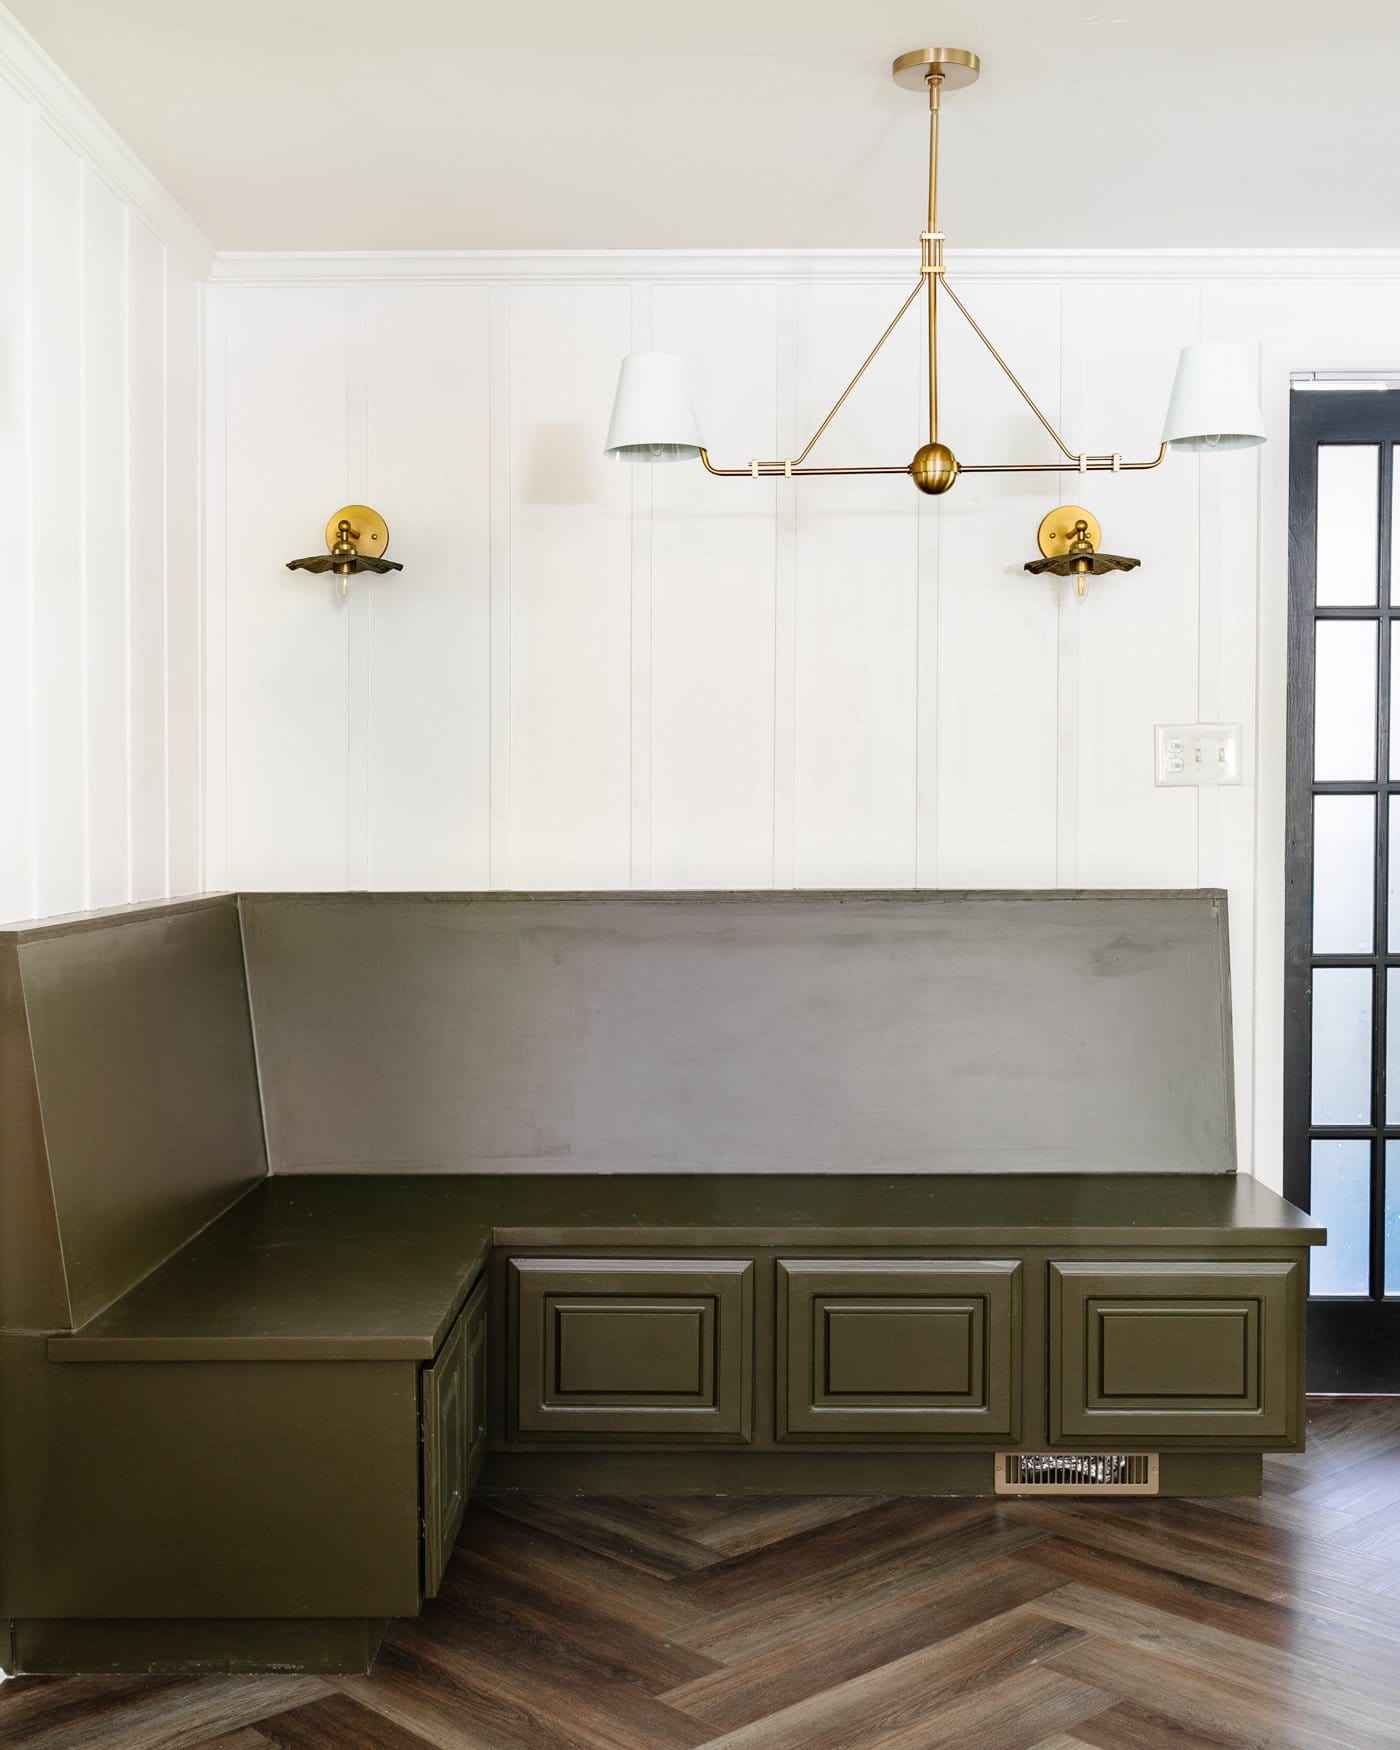
The Finished Batten Wall
Don’t you think these two batten walls add so much to this little breakfast nook corner? I love it so much!
We added these vintage style sconces to bring more light into this windowless space. What do you think?!
They work so well with this linear chandelier that adds a touch of modern, and the brass pops against that batten wall we painted Benjamin Moore Chantilly Lace.
Wrapping Up Breakfast Nook Details
I still plan to paint the air vent and add knobs to the banquette cabinet doors.
(Now that it’s dry, I have to admit, don’t love the paint I had to use on the banquette thanks to supply chain issues causing my favorite cabinet paints to be sold out. But oh well. If that’s our biggest challenge, I’ll take it.)
I just got the call this week that the newly reupholstered cushions are finished! So it will all be coming together in here soon.
These DIY herringbone LVP floors still look absolutely amazing since we installed them a few weeks ago! Next on the list is building a table, refinishing some secondhand dining chairs for the other side, and adding some vintage art and decor finds.
It will be so charming as we wrap up the final details.

Have you ever done a DIY batten wall before? Or found a new use for lattice strips? They’re the best for so many things!
More Project Ideas Using Lattice Strips
If you want more wall molding ideas, here are a few more too.
More DIY Wall Molding Ideas

[ad_2]
Source link
More Stories
So You’re Planning On Building A Garden That Has A House In It! – Part 1
Electric Garden Tools Or Petrol Garden Tools – Which Are Better For the Home Garden?
Calgary Condo Living